7usb Windows installation - creating bootable usb - how to install windows 7
Be very useful and easy to carry in Windows 7 to create a bootable USB and
Windows 7 installation, I'll let you know how you can.
Materials!
Windows 7 iso file preparation
4GB USB-old, but when more than 4GB of memory capacity is
This is because the capacity is 3.5GB iso file.
Search on Naver ultra iso program you are in the Archives.
3 must be prepared for this.
Windows 7 installation, I'll let you know how you can.
Materials!
Windows 7 iso file preparation
4GB USB-old, but when more than 4GB of memory capacity is
This is because the capacity is 3.5GB iso file.
Search on Naver ultra iso program you are in the Archives.
3 must be prepared for this.
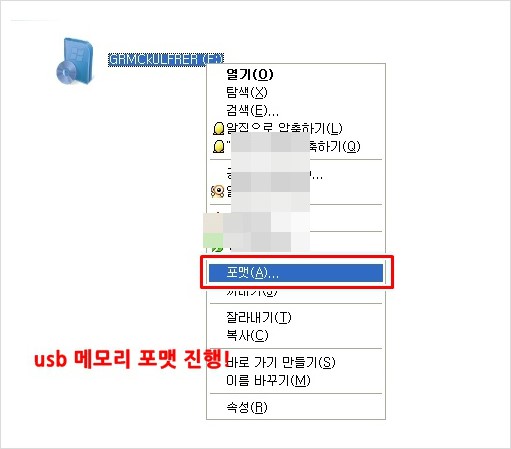
First, connect to the computer and then format the usb stick is haejusyeoya.
My Computer -> usb memory selection, right click -> Format
My Computer -> usb memory selection, right click -> Format
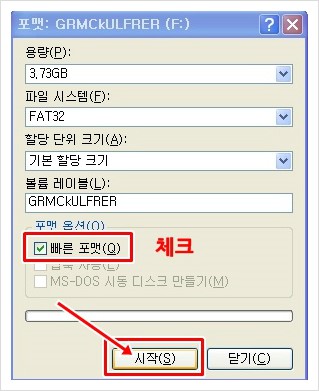
General format does it take a long time and press start after a quick format check.
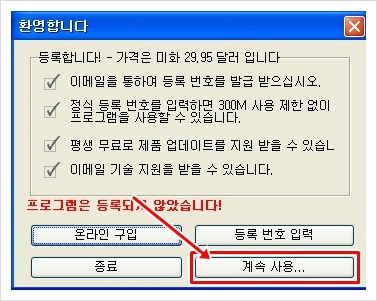
Download and install ultra iso Try running the program, as shown above, I'm coming.
Press the button and we can continue to use.
Press the button and we can continue to use.
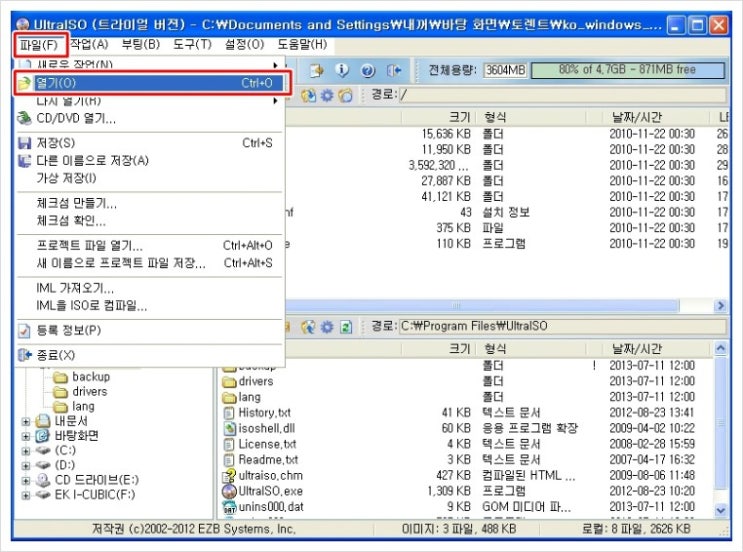
Click the file by clicking the Open button, please specify the iso file.
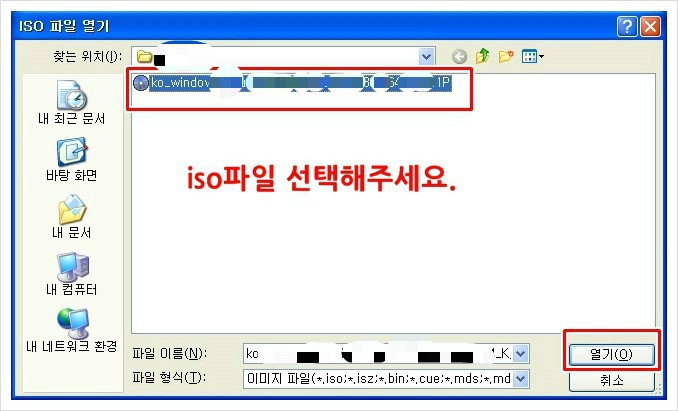
So where iso file, click the Open button in the press.
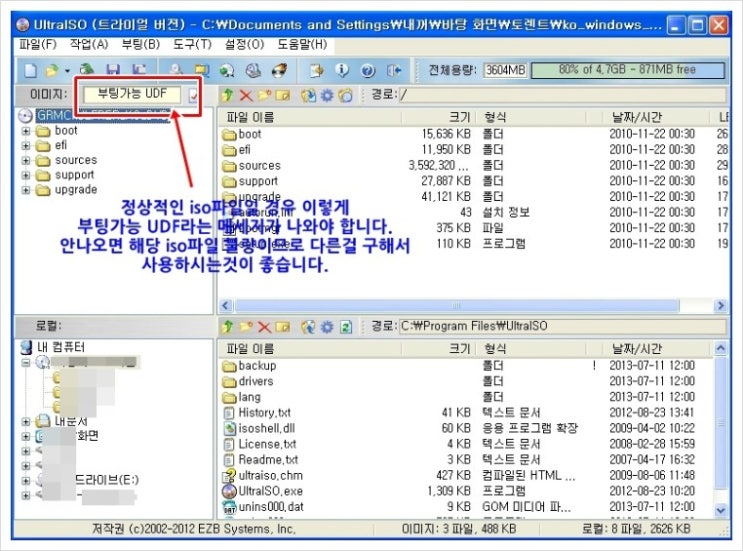
This part is the most important part. Windows 7 iso file, opened the file, I do specify.
A message on a bootable UDF see? Be like that can boot normally with the Windows 7 installation usb
And create a bootable iso file If you get the message that can not be booted because file
Must be made to find other iso file You can make non-state should not boot because we can not use it.
A message on a bootable UDF see? Be like that can boot normally with the Windows 7 installation usb
And create a bootable iso file If you get the message that can not be booted because file
Must be made to find other iso file You can make non-state should not boot because we can not use it.
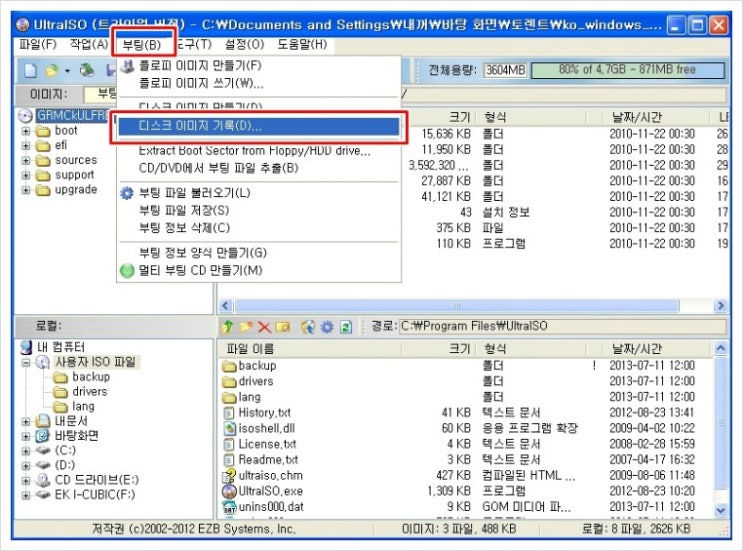
부팅메뉴-->다스크이미지
기록을 선택 클릭해주세요.
다음단계 진행하기전에
컴퓨터에 usb메모리는 연결해주시기 바랍니다.

In this process, the computer is connected to the usb memory automatically, without having to set aside
As a result, they now have usb connected to the computer by pressing the Write button just right if you proceed highs titles.
As a result, they now have usb connected to the computer by pressing the Write button just right if you proceed highs titles.
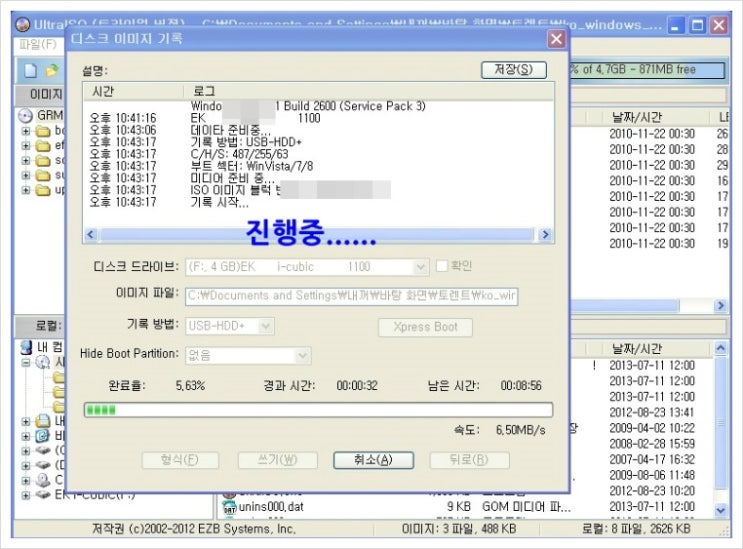
Creating a Windows 7 usb installation is in progress.

The burning is complete, the message has been successfully naohmyeonseo all work has been completed.
This is normal operation to create a bootable usb stick I've been proceeding with the installation process.
Will work without any problem.
Easy to understand the entire process described in one picture deuryeotseupnida without exception.
Ttarahae are printed in slowly bosimyeon.
This is normal operation to create a bootable usb stick I've been proceeding with the installation process.
Will work without any problem.
Easy to understand the entire process described in one picture deuryeotseupnida without exception.
Ttarahae are printed in slowly bosimyeon.
[출처] 윈도우7usb설치-부팅usb만들기-윈도우7설치 방법|작성자 아름이
댓글 없음:
댓글 쓰기